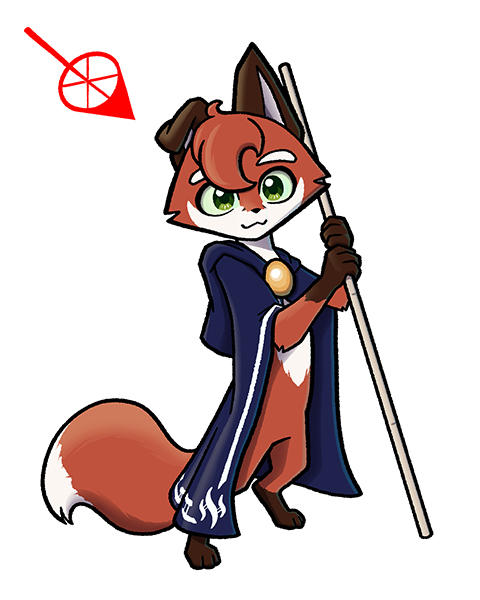
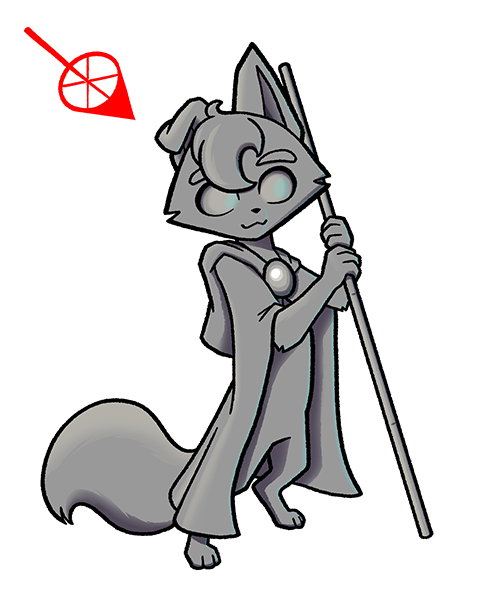
Step 5: Rendering
Now onto the rending, which comes in two parts: light and shadow. First, establish a lighting direction with an arrow. This will help us determine where to place our highlights and shadows. These elements will serve to describe the form or volume of the character.
For my illustrations, I use a dark blue or violet on a multiply layer for the shadows, and a bright yellow on a screen layer for the highlights. Lower the opacity of each to your liking, so that the colors blend nicely. Shadows tend to be cooler in color, while highlights tend to be warmed in color, however, it is important to note that the shadow usually is the opposite hue of the light being cast. For example, if the light were red, then the shadow would have a greenish hue.
For this step, I sometimes find it helpful to create a layer of gray over the other colors, which will help me to focus on just the lighting. If it reads well on just gray, it will read well with your flat colors. Consider how light would realistically interact with your character in a three dimensional space. Shadows usually come in two varieties: form shadow and cast shadow. A form shadow occurs around an object on its side opposite the light, like the dark side of the moon or, in this case, underneath Amos' tail. A cast shadow is what happens when an object is blocking the light from reaching another surface, like the moon casting a shadow on the earth during a solar eclipse or, in this case, the shadow cast on Amos' side by his cloak.
If you want to be extra fancy, you can include a bounce light in the shadow, which can add a lot of life to your piece. In real life, a bounce light occurs when light is being reflected off of a different surface onto your subject. For this example, I used cyan as the color of my bounce light.
Also consider the material that the light is being cast onto. Shiny objects made of metal or certain fabrics will tend to produce harsher highlights. The metal button on Amos' cloak is a good example. The eyes are also highly reflective, however, I will typically color the irises on a separate layer to get the exact colors that I want, making them appear more lively.